← Back to Instructions 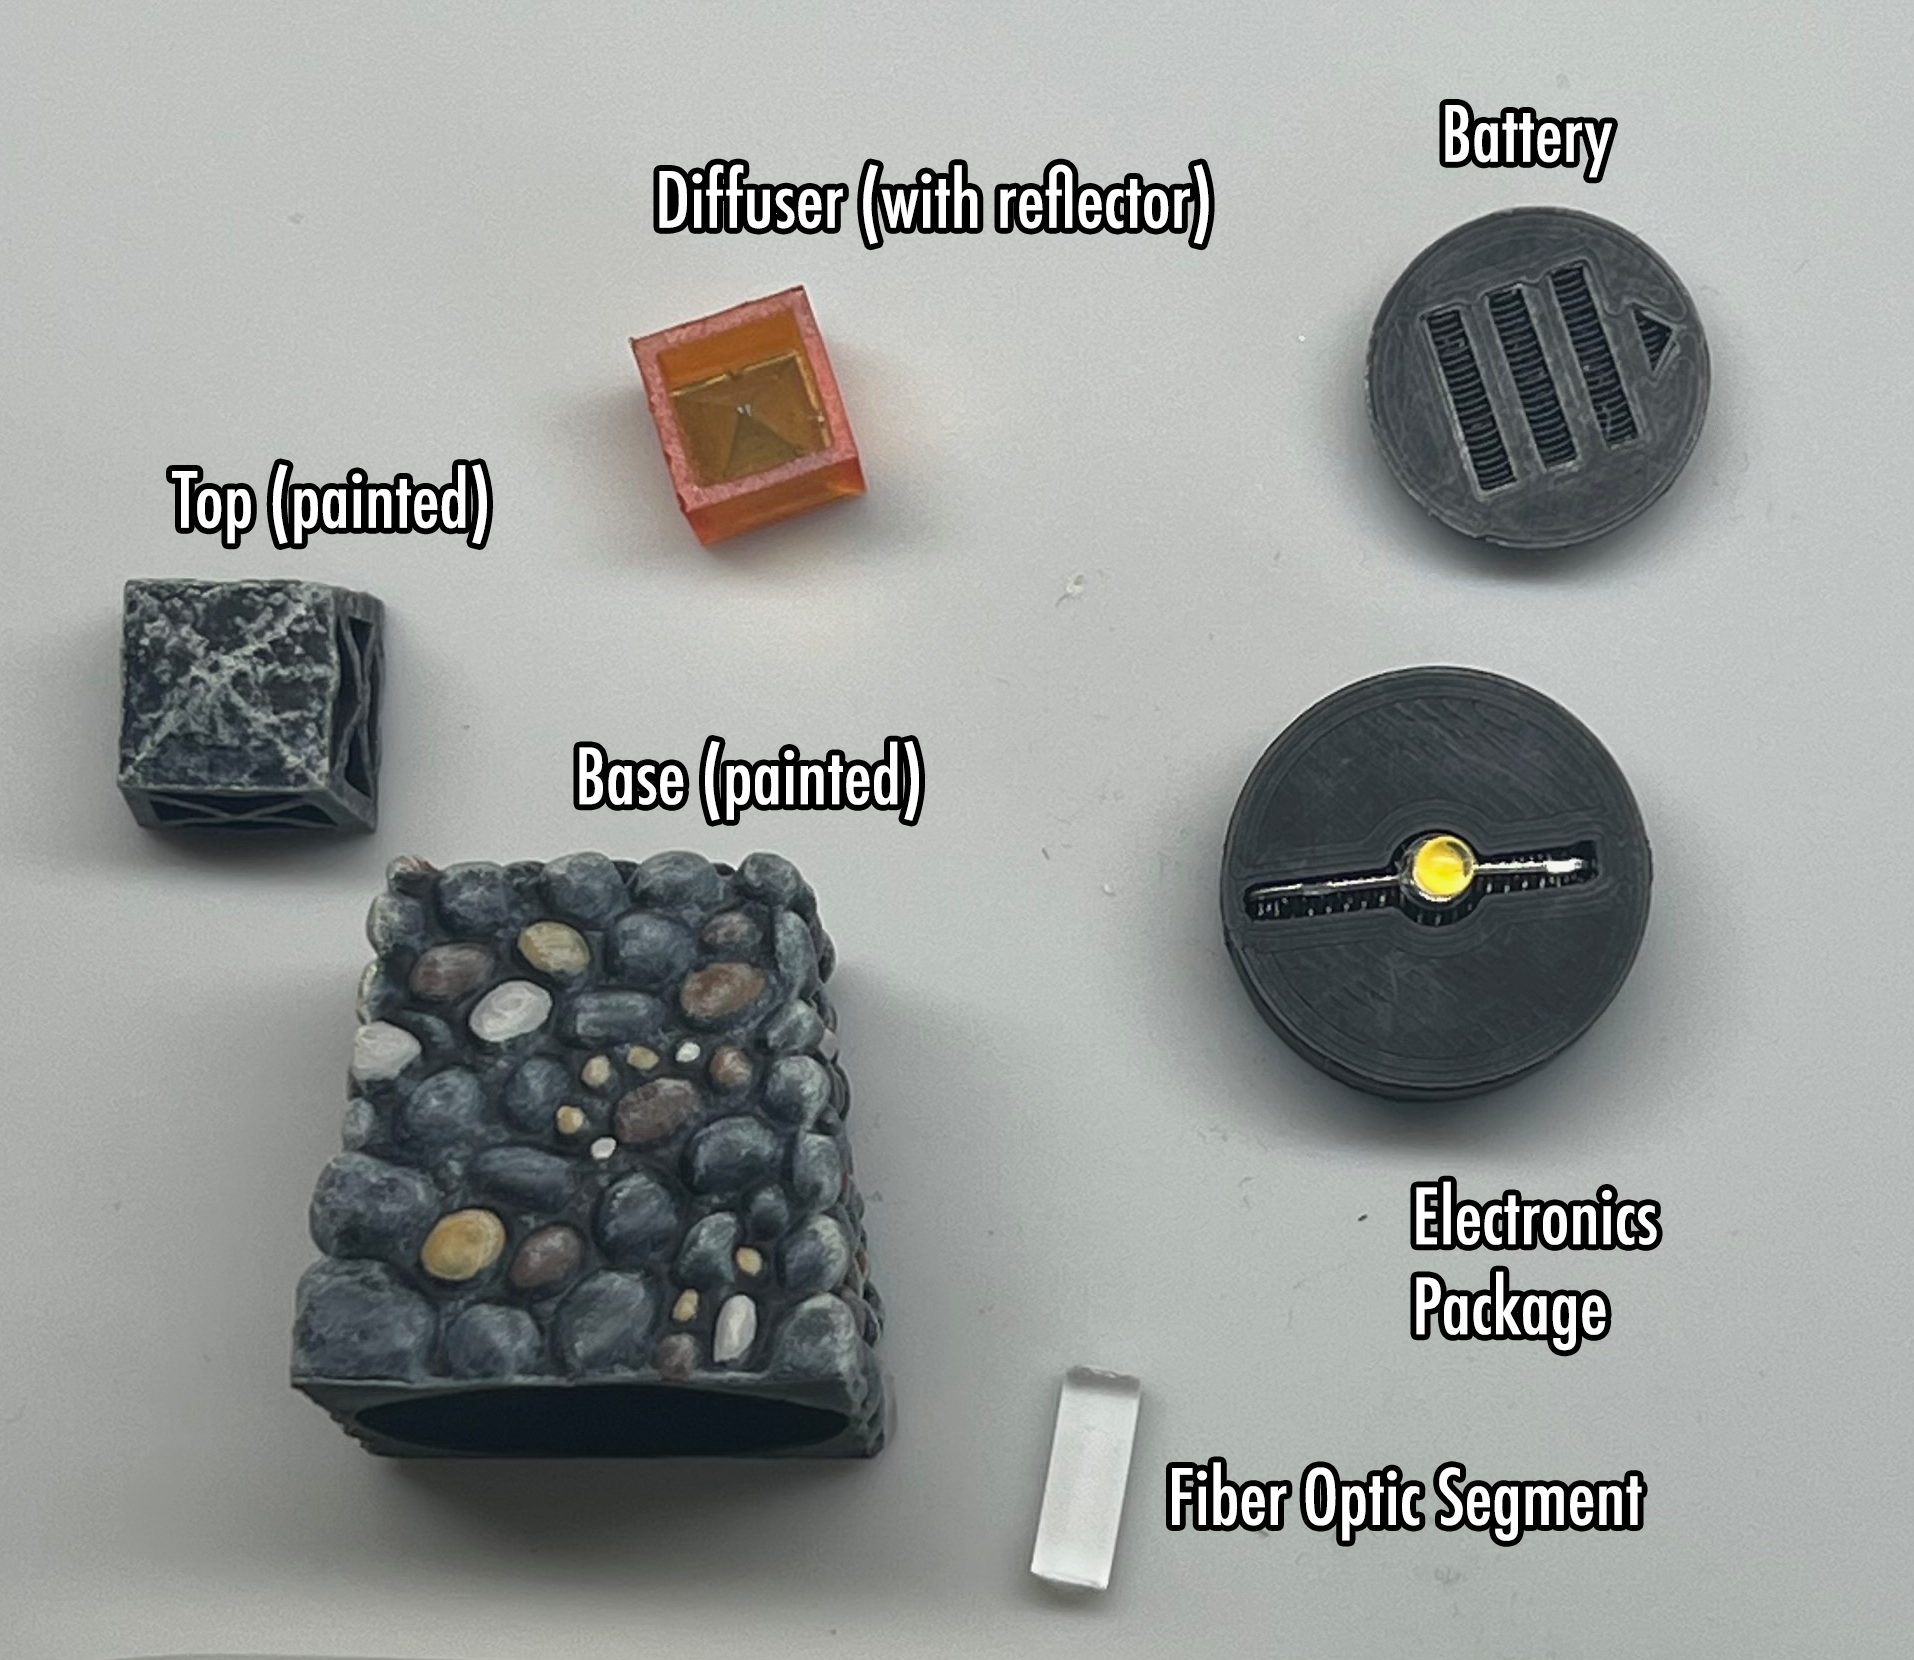
-
1. Paint All Components
Apply a base coat of Rustoleum Camo Black (flat/matte) to all components. Once dry, dry brush with neutral gray and white to bring out the stone texture. Paint individual stones in varied browns and grays for character. Finish with a very light dry brush of unbleached titanium white across the entire surface.
-
2. Install the Electronics Package
Once the paint is fully dry, apply super glue to the inside of the base and insert the electronics package. Hold firmly for 30 seconds and allow to fully cure before continuing.
-
3. Insert the Fiber Optic Segment
Insert the fiber optic segment into the hole at the top of the base until it is flush with the surface. Press firmly to ensure it is fully seated.
-
4. Insert the Diffuser into the Top
Carefully insert the diffuser into the top piece. Important: the silver reflector must face outward when you insert the diffuser. If the reflector faces inward, light will not be able to enter the diffuser properly.
-
5. Test Before Final Assembly
Insert the battery and verify the lantern produces light before gluing the top to the base. It is much easier to make adjustments now than after the glue has cured.
-
6. Glue the Top to the Base
Apply super glue around the bottom edges of the top piece. Carefully align it with the base and press firmly into place. Hold for 30 seconds and allow to fully cure.